This
is page 4 of 4 documenting the
conversion of the El Camino to
Throttle Body Injection.
Click
on the pictures to see larger views.
Use your browser's 'back' button
to return to the page.
This
is page 4 of 4 documenting the Click
on the pictures to see larger views. |
|
 |
4/5/05 |
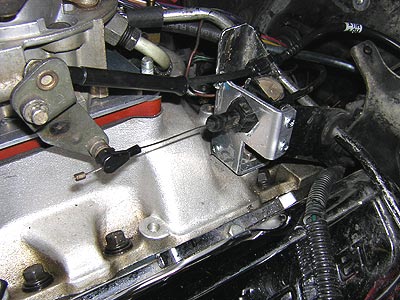
This is the original cable bracket. |
|||||||||||||||||||||||||||||||||||||||||||||||||
|
|
I cut the old one in pieces, and used the throttle cable end, and bolted it to an intermediate piece I fabricated with the Aluminum from Robert. It isn't pretty, but it was hours of measuring twice and cutting once.... OK 3 or 4 times. There is no pattern for this. I measured the original cables carefully. |
|||||||||||||||||||||||||||||||||||||||||||||||||
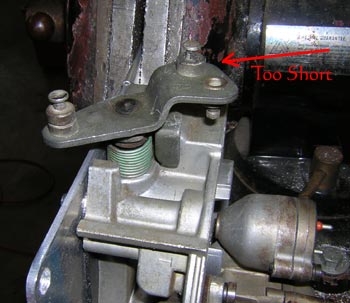 |
The one nib is too short to line up with the Cruise rod. I had to drill that one out. |
||||||||||||||||||||||||||||||||||||||||||||||||||
 |
|
This shows the extension I used on the AFB for the same purpose. | |||||||||||||||||||||||||||||||||||||||||||||||||
 |
|
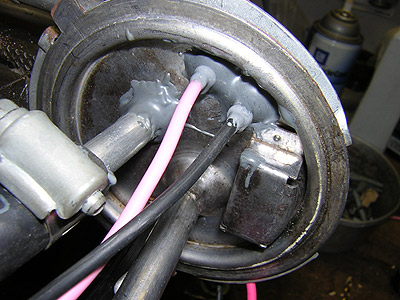
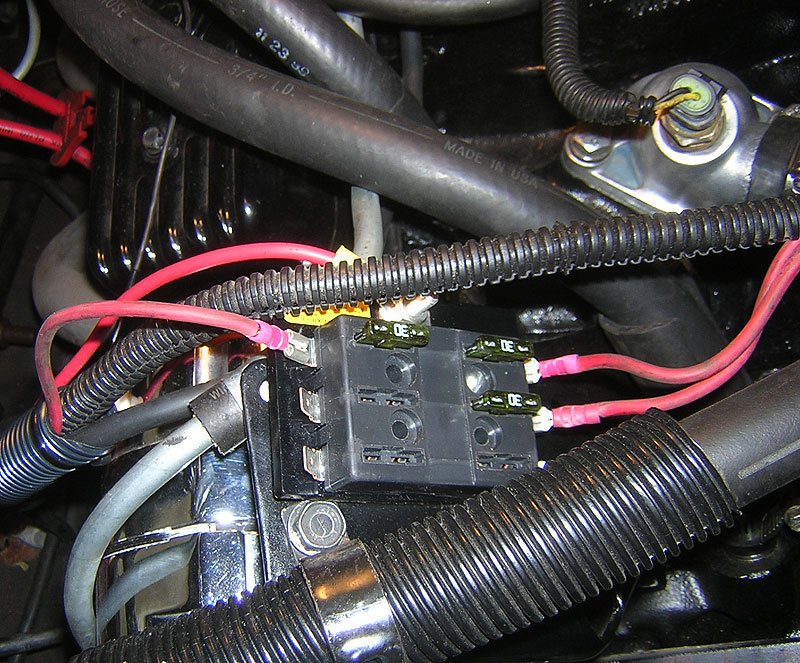
This is the relay board, with 2 fuses, the fuel pump relay, and the ESC module (Top view). | |||||||||||||||||||||||||||||||||||||||||||||||||
|
Look Ma... No screws sticking out. I ground down the ends to be flush. | ||||||||||||||||||||||||||||||||||||||||||||||||||
 |
There is room under the passenger side cover, but only IF you get rid of the kittle vent 'A' frame hump on one side. I know Robert put his behind the radio, but I have too much back there already. | ||||||||||||||||||||||||||||||||||||||||||||||||||
 |
Re-covered with the insulation. | ||||||||||||||||||||||||||||||||||||||||||||||||||
 |
view from the compartment side. Glad it isn't too visible. I had to relocate the courtesy lamp further to the center. (round hole) | ||||||||||||||||||||||||||||||||||||||||||||||||||
 |
4/5/05 | This just came in the mail today. $32 on eBay. | |||||||||||||||||||||||||||||||||||||||||||||||||
Parts
total for today:
|
Parts
list for the tools and parts today:: Crimp connectors, Ace HDW. |
||||||||||||||||||||||||||||||||||||||||||||||||||
| 4/6/05 | Worked on routing and connecting wires from 7 PM till 2 AM. All but the distributor is wired. Not sure of routing with the MSD. | ||||||||||||||||||||||||||||||||||||||||||||||||||
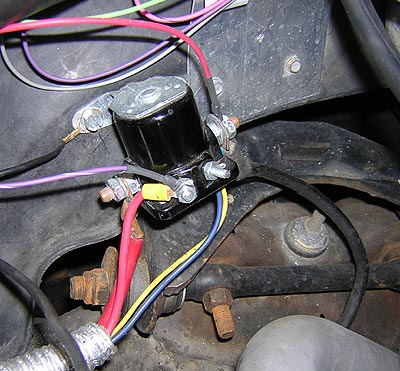 |
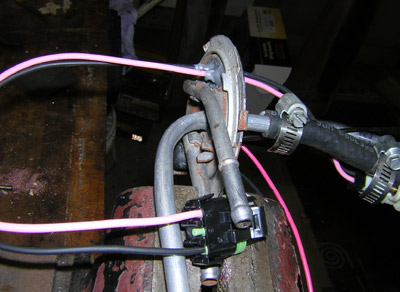
4/7/05 | Called Robert and confirmed routing. Used the white wire, instead of the green/purple, to the 2 wire terminal of the distributor. Tried to start, sounded like battery is dead. Something's rotten. Fuel pump runs for a short time, sounds like relays fighting each other for power of the starter solenoid on cranking. Does not turn over. Won't start. I'm to tired to fight. F it for tonight. Is it the wiring on the solenoid? See pic (click for closer) the instructions say "small wire on inside terminal" Thanks.... which one? symptoms are the same with purple wire unhooked. |
|||||||||||||||||||||||||||||||||||||||||||||||||
|
4/9/05
New MAP sensor Misc. Ground Cables, and terminals $22.00 More brass fittings for the vac lines $8.43 |
I got it running after getting 3 new battery
cable ground wires. I have a dual post battery (new January), and grounded
the battery to the new block off plate for the fuel pump, that screws in
to the block. I have the rest of everything else.... Firewall, fuel pump,
fender, starter solenoid, computer, and MSD, grounded to a 4 way block
designed for monster stereos. That goes to the top post on the battery. I have noticed a lot of Carbon coming from the exhaust. I believe that
there is probably a lot of carbon build up, from a long time of running
rich (in comparison), with the carb. |
|||||||||||||||||||||||||||||||||||||||||||||||||
 |
4/16/05 Plastic wire loom tubing $4.00 |
I cleaned up the engine compartment and tucked in all the wires. Looks a lot better, and shouldn't have any melted wires. Make sire you have a lot of little black zip ties! (Larger view is very large on this one) | |||||||||||||||||||||||||||||||||||||||||||||||||
4/18/05 I brought the timing back down to about 6, nad made some re adjustments to the IAC. This helped idle, and hesitation at part throttle. I had advise from another friend to put it to 4 to see what it does. Not used to the computer handling these things. |
|||||||||||||||||||||||||||||||||||||||||||||||||||
Running Total $908.57** (Please don't go back and re add all this to see if it's right, I had to have missed something anyway) |
**NOTE** Note to the Note...... This project will always need more money, and will never be completed. That's Car Crafting for ya! (donations accepted <Grin>) |
||||||||||||||||||||||||||||||||||||||||||||||||||
Fuel Injection badge.... proudly worn VICTORY!! Summary:
|
|||||||||||||||||||||||||||||||||||||||||||||||||||
| I am having a problem with the TCC locking up in the 350C, It does so just fine, but on & off all the time at 30 - 35 mph. This can be corrected by having a custom chip burned. I will pursue that when I get the $80 to have someone do it. | Custom Chip is the Solution |
||||
| 8/3/05 Purchased 350 injectors. I discovered in the research for the chip, that I have 305 injectors, 40# per hour. The ones I got from Ebay were $xx, and are rated at 55 # per hour. $50 on eBay. | Installed
the next week. Had to get a kit for the seals and gaskets. About $25 |
||||
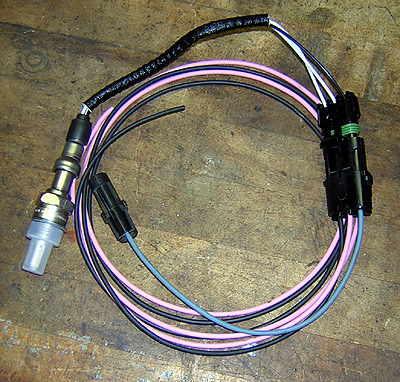
9/14/05 Installed Standard Performance brand 3 wire Oxygen sensor. This was $59. GM Part number 25176708, AC Delco #213-632 The sending lead is black, and there are 2 white wires. You put an ignition + to one white wire, and ground the other one, for the heating element. |
 |
||||
9/17/05 DISASTER
..... Blown Head Gasket The heads were NOT 350 heads, the machine shop had some replacement 350 heads for $300, all fresh. So that's what went on. The compression was terrible, because the chambers were bigger than the old heads, and the pistons were bowl shaped. |
 |
||||
Back together
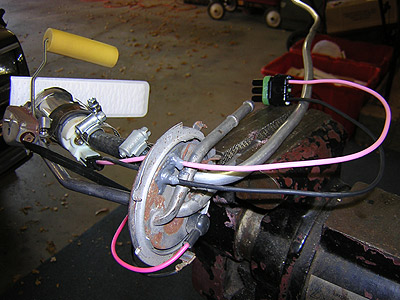
again. Still fine tuning. 10/29/05 Also on 10/29/05 Replaced the Fuel sending unit with my original one, but modified by Robert Adams to work with FI.
|
Idle , in
Drive ** I was told that this is too high** We tested this last time, and only got it to knock at almost 55 in 1st gear, so I know the sensor works. |
||||
After battling poor performance form an engine with very low compression,
I bought a marine 350, 1990 vintage. The following is after installation
of this engine
|
 |
||||
| You will notice the kick down cable pulled loose, and set behind where it's supposed to be. This allows for about another half inch, and gets the kick down working again. I need the manifold and brackets to really change anything here. | 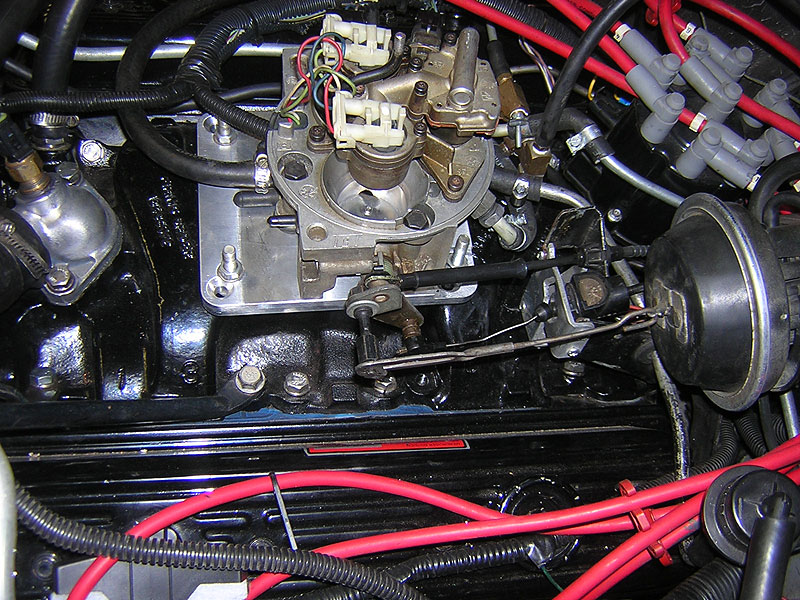 |
||||
Fun
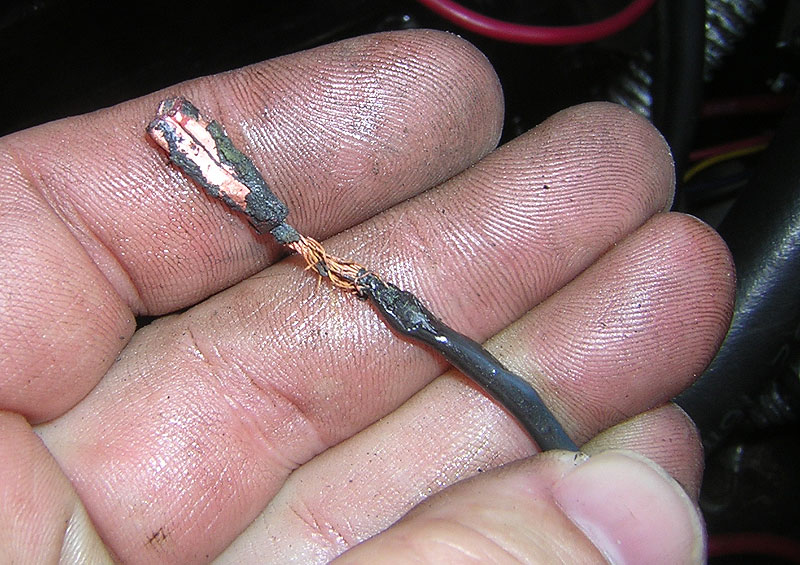
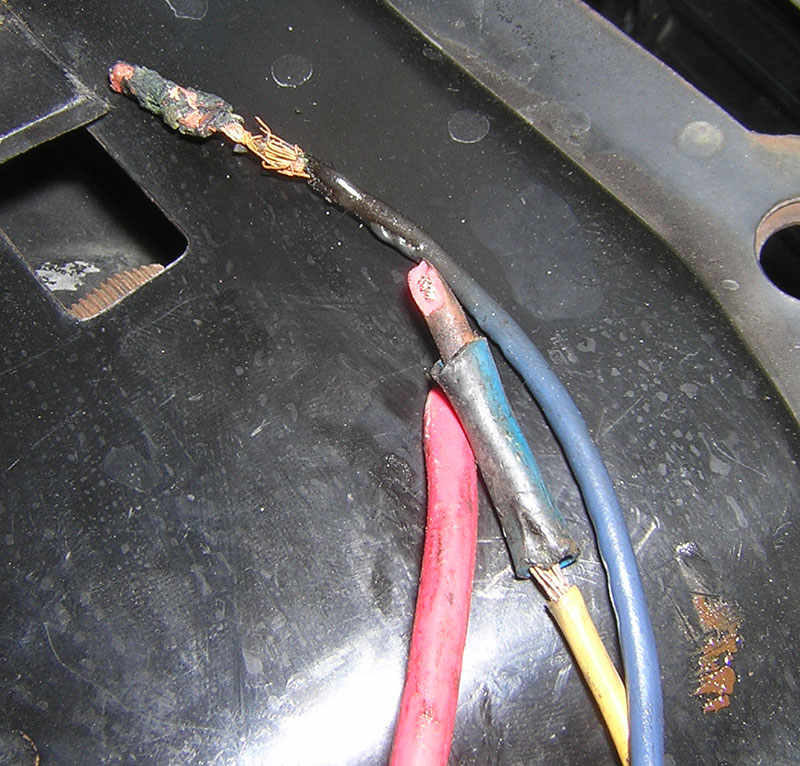
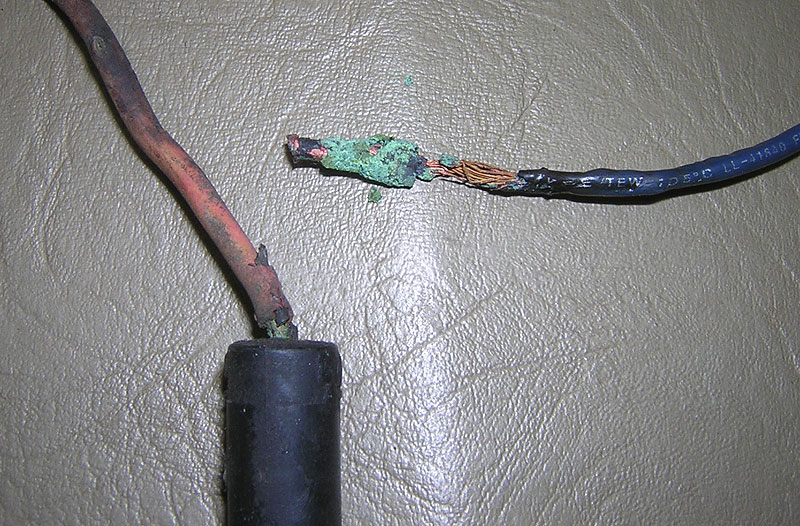
in the Sun This was the first time I have ever had the El Camino towed. It just about got impounded, but the Lady Police officer had mercy, and let me wait for the free tow from my insurance company. They were only 10 minutes away. It was northbound on Route 25 (no shoulder), only 3 lanes there anyway, just short of the intersection of Route 64. 1.5 miles from home. I called Robert when I got home, and he was on the phone with me when I found the wires. I had called him, and left a message, and dove in with the multi meter to start testing. We ruled out a lot, before pulling on the shielding of the wires in question. You see what I came up with. Ended up to be the fuseable links, and attached wires. Of course these were in a tube, bolted to the bell housing, obstructed by headers and a starter. That was the biggest PITA. I bought a fuse block at the local NAPA that was still open, and put it in a temporary spot. It's running again. Still need time to refine it. (correct connectors) This could be the stalling and cutting out gremlin I have had for a long time. Click on the pictures for a bigger view. Below is a picture
of the improved connections. 8/4/2006 The connectors were the wrong
size, and one vibrated loose. I soldered the connections and used
heat shrink tubing. |
|
||||
| August 4th, 2006 Car was bucking and missing on the way home from work. Died in the driveway when I pulled in. Started and moved again, but something was up. | I took the above assembly out, trying to find an intermittant miss. A new fuse set up is on the way, but I hard wired them to try and isolate the problem | ||||
| Talked to Robert on the phone, and deducted that the pickup coil inside the distributor could be the culprit. I found one for $10 at the friendly local parts store. See what the old one looks like compared to new, at the right. | 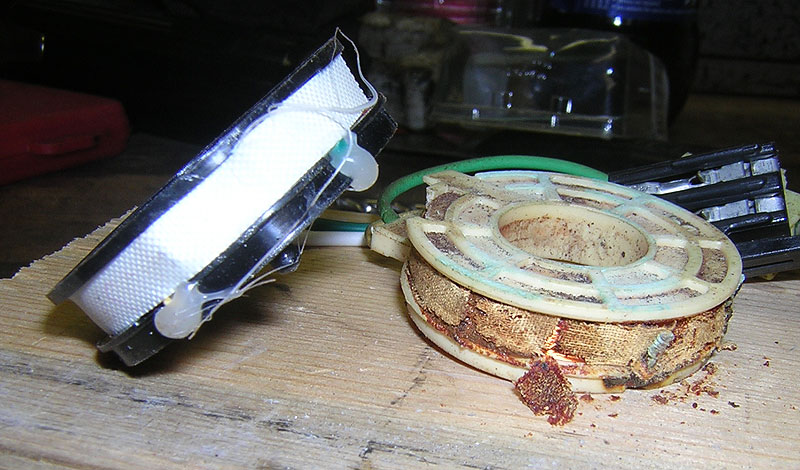 Yuck. The new and the old .... |
||||
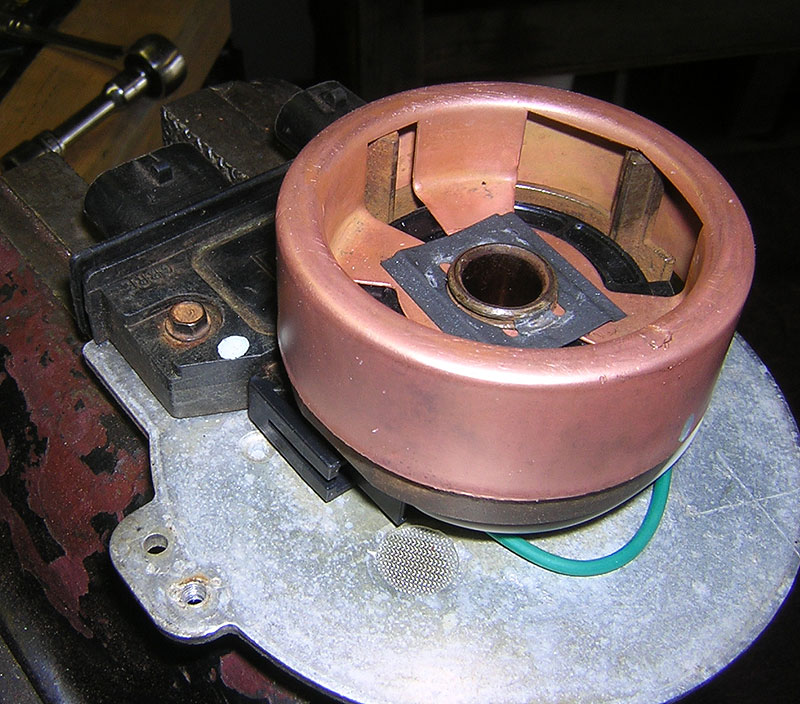 This is the spare distributor, with the new coil under the cleaned up copper collar. I ended up putting the new module I bought on this too. It was in the car while I was working with this one. |
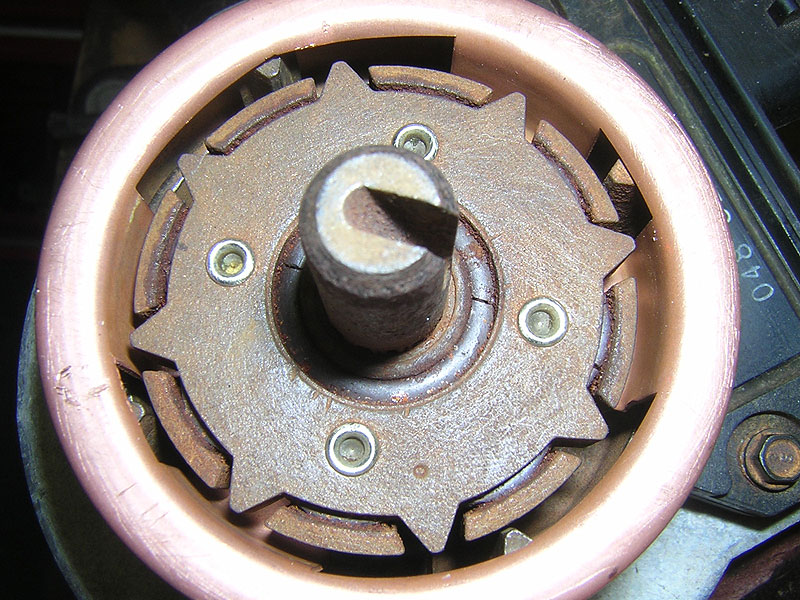 I cleaned up the top as best I could as well. Turned out the distributor gear was a lot less worn on the one in the engine too, so I transferred all the best parts to one distributor. |
||||
| August 5th. We went out to eat tonight, and Cindy even commented on how good the engine sounded. (Minor miracle there) It starts better than it has since the TBI conversion, if that's any indication. No miss so far, but this was a real random thing. Let's hope this was the other major gremlin. | August 7th. Back to the same old tricks. Just died ... flat out , on the way home. Restarted, but it was in gear! Going to check the ignition switch, and all the under hood wiring. All signs point to the computer or the chips, or both. | ||||
| 8/20 - The El Camino
has been dead for a couple weeks. I have a bad computer (I think ...
I hope).
I bought a TBI intake
on ebay for $23, shipped. I
have a computer coming from TX for $25 |
August
26th. It's a great day. The new computer fixed the problem. I am taking
issue with Standard Automotive parts. The rebuilt one I got Months earlier
never worked, and in fact caused me a lot of grief. That was a big problem
even before changing the engine. Gobs of power. I can break the tires
loose pretty much at will, but if they hook up ... hold on. This engine sounds really great. Problem declared solved a week later. September 8th, the parts store gave me a new computer for free. Thanks to Thompson's Auto Parts, Saint Charles, IL. |
||||
I set up a page to post some data logged from the WinALDL program. I bought a cord that plugs in to my laptop from aldlcable.com. The software is available here. See this page for results. As I learn more about the program,, and log more data, I'll post more on that page. |
|||||
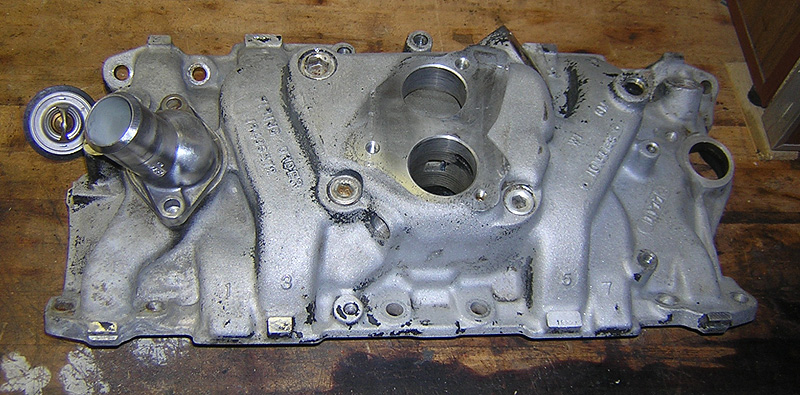
 |
I bought this on eBay for $23 shipped. looks pretty rough | ||||
 |
I painted it with heavy bodied stripper, and went to the car wash | ||||
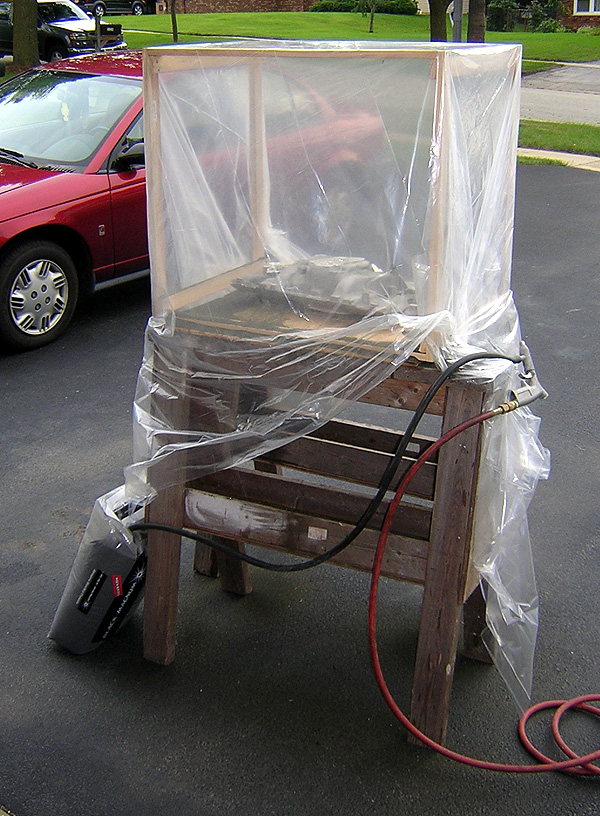 |
This is a rig I fabbed up to keep the sand from going everywhere. They had some black stuff at the lumber yard for sandblasting, cost about $8 | ||||
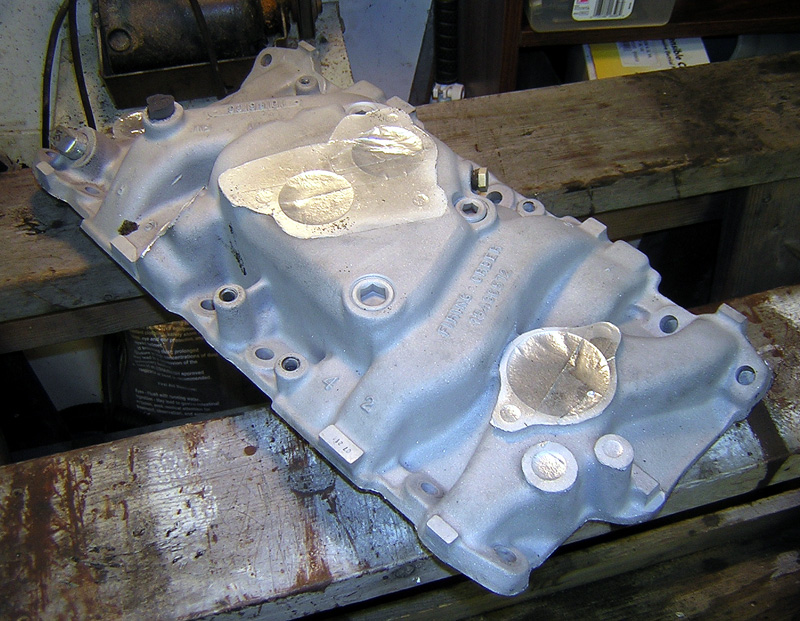
 |
Partially blasted, letting the compressor catch it's breath. Notice the Aluminum tape, keeping the gasket mating surfaces clean. Thanks for the tip Robert! | ||||
 |
Finished, and ready to hose out all the sand, then install. | ||||
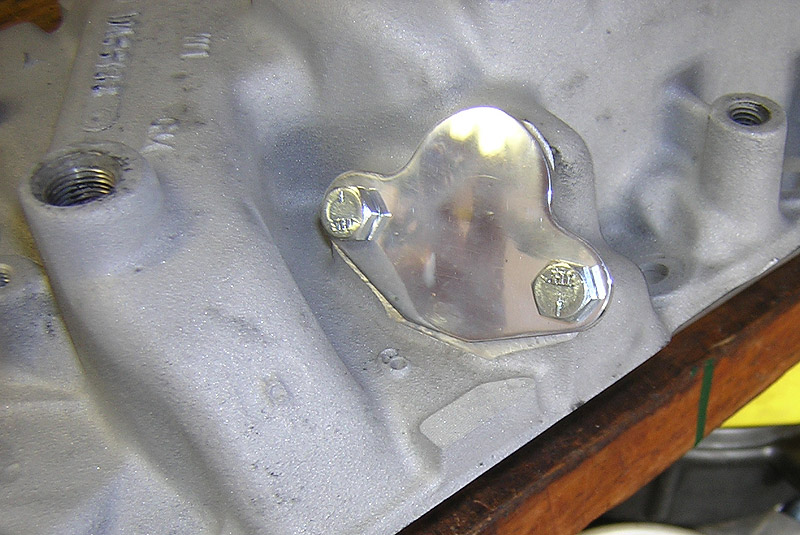 |
I used the Aircraft Aluminum from my old TBI adaptor to make an EGR block off plate. We have a polisher on the premises <G> | ||||
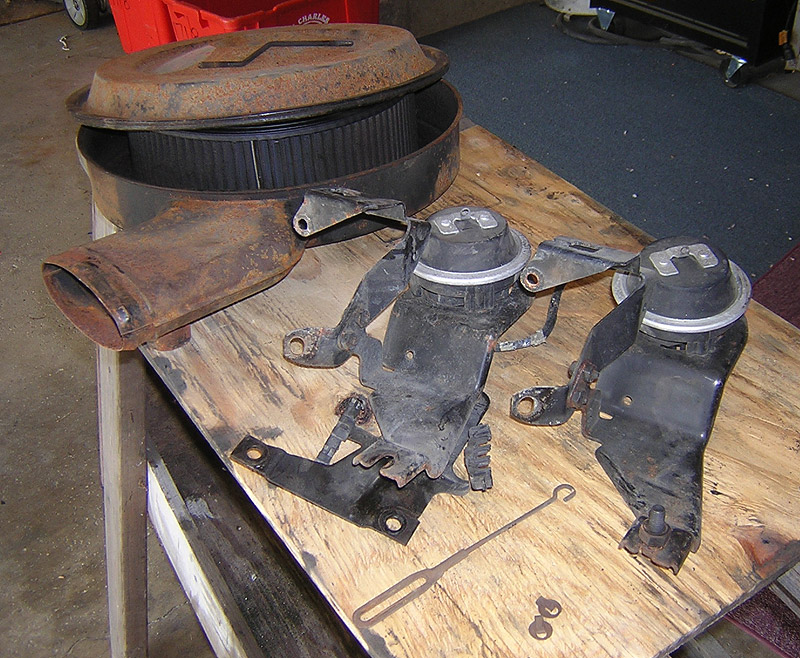 |
This is the booty from the junk yard crawl on 9/9/06. 2 brackets from throttle body trucks, and a taller air cleaner than I have, complete with K&N element. $25 for all. | ||||
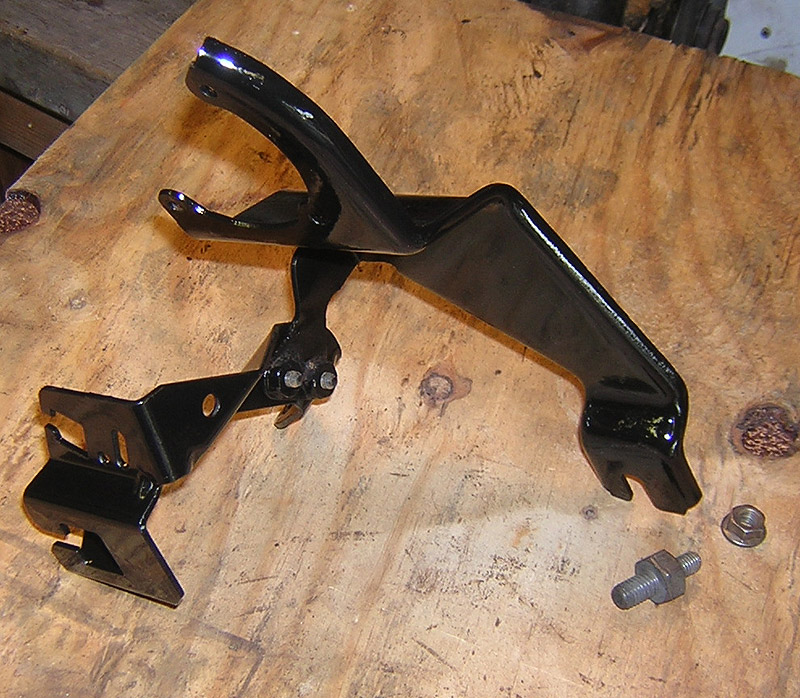 |
This is the bracket that I separated, wire brushed, sanded and painted, and put back together. Both of the trucks these came from had the nut shown, with a 15 mm stud, and a 13 mm nut to hold the bracket out a ways from the head. There was another bracket for wires you can see in the picture above. Don't think I am gonna use it. | ||||
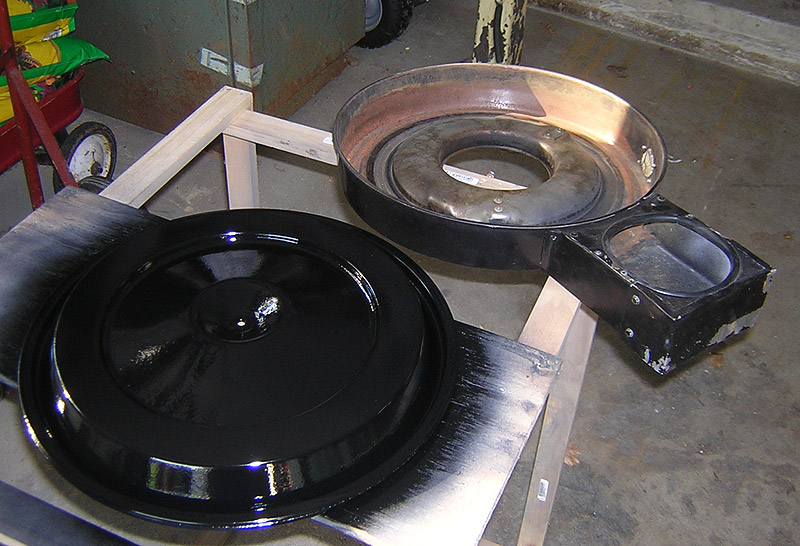 |
I discovered mid way in to the sanding, that this lid will fit the bottom that I have already modified to work with the cowl induction hood. Doesn't look very pretty next to that top though! | ||||
 |
The bottom half gets a little scuff and squirt. | ||||
 |
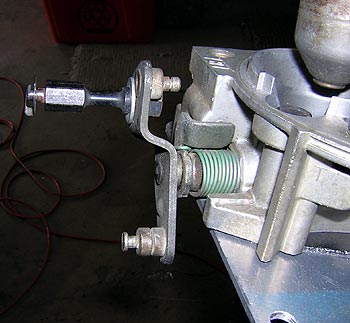
These are the size
of the existing (250K miles) Cruise diaphragm, next to the new ones.
Will the new one work? All the plugs and hoses are the same. The back
half looks identical. I installed the new one and it works great. Better clearance too. |
||||
| What happened next? |
Page 1, Page 2, Page 3, Page 4 You are on Page 4
|